


Skip to content

Education

Professional development for teachers who want their 3D printers doing real work in the classroom.

A half day or a full day, hands on the machines from the start. You leave knowing how printers work, why prints fail, how to fix them, and which parts to print first for your class.

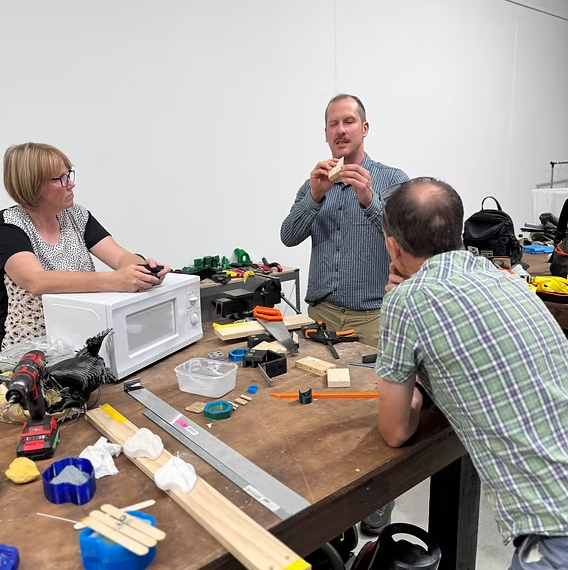
Jeremy demonstrating a 3D printed part to two teachers at a workshop bench covered with tools and printed samples

Your instructors

Two people who've already fixed a harder version of your printer problem.

Every workshop is run directly by Amos or Jeremy — people who build, break and repair 3D printers for a living, not just on the day they teach you.

Portrait of Amos Breyfogle standing on a Queenstown lakeshore with snow-capped mountains behind

Amos Breyfogle

Principal — Advanced Manufacturing & Strategy

Trained as a manufacturing engineer, Amos spent his career putting 3D printing to work where failure isn't an option: aerospace tooling in Germany, automotive production, then leading additive manufacturing on Stratasys's partnership with McLaren's Formula 1 team. He now sits on the board of Advancing Manufacturing Aotearoa and works with leading engineering teams throughout New Zealand. Whatever goes wrong with a classroom printer, he's already fixed a harder version of it on an F1 factory floor.

Connect on LinkedIn(opens Amos Breyfogle's LinkedIn profile in a new tab)
Portrait of Jeremy Platt standing by a New Zealand river

Jeremy Platt

Principal — Product Development & Education

After training in science and education, Jeremy organised STEAM teacher professional development at the University of Sydney and University of New South Wales, worked in a materials science department developing brand new printing technology, and spent time in Microsoft's Quantum Computing division. His engineering focused company then gave him thirteen years of CAD and 3D printing experience, focusing especially on using printers to build moulds and tooling behind real carbon fibre parts. Between research labs, classrooms and workshops, Jeremy has spent his career translating science and technology into things people can build, understand and hold in their hands.

Connect on LinkedIn(opens Jeremy Platt's LinkedIn profile in a new tab)
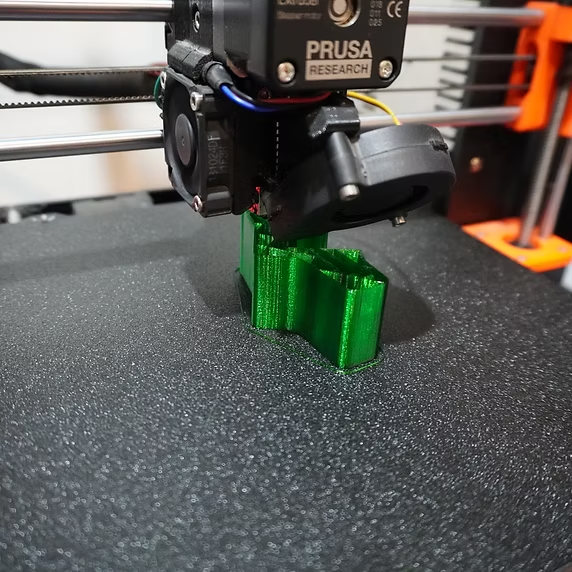
A Prusa printer running, the extruder laying down filament on a part mid-print

Workshops

Most school 3D printers haven't earned their keep. Yours can.

Right now yours probably lives in a cupboard, or prints trinkets and little else. That changes on the day — every part you print came out of a real classroom problem, chosen by the teachers who hit it.

Half day

3D Printing for the ClassroomFundamentals

The morning on its own. You work on a real machine, learn what the settings actually do, and break a few prints on purpose so you know how to fix them when it happens at school.

$250per teacher
Download run sheet
Runs
8:30am – 12:30pm
Best for
Teachers new to 3D printing
You leave able to
Get a printer running and know how to keep it running.

What you cover in the morning

  • How FDM printers work, end to end
  • Which filament to reach for and why
  • Slicing: orientation, supports and the settings that matter
  • The four most common failure points, and how to fix each one

Full dayMost booked

3D Printing for the ClassroomTechnology Teachers

The full day. Same morning as the Intro, then an afternoon designing and printing jigs, moulds and teaching aids — and mapping how the work fits into a unit you already teach.

$415per teacher
Download run sheet
Runs
8:30am – 4:30pm
Best for
Technology teachers
You leave able to
Leave with printed jigs, moulds and files your class can use next term.

Includes the full Intro to 3D Printing morning

Then in the afternoon

  • Design and print a working workshop jig
  • Make a mould and cast parts from it
  • Build a class set of teaching aids
  • Take the working files home

Sending more than one teacher?

$50 off per head

Two or more teachers from the same school and every place drops by fifty dollars. Mix and match the Intro and the full day — the discount applies either way.

Who comes

Teachers at every level of the printer.

01

Technology teachers

Hard materials, DVC and workshop teachers who want the printer doing useful work — jigs, moulds, teaching aids — not sitting idle between units.

02

Teachers with a printer that never quite works

If it jams, will not stick, or lives in a cupboard because no one is confident with it — you will leave knowing how to fix it and keep it running.

03

Faculties and HODs

Rather train the whole department at once, on your own machines, on a teacher-only day? That is what the in-school option is for.

What you cover

Six things, in the order that makes sense.

You work on real machines, print real parts, and leave with the files behind them. The printer will fail during the day — that is part of the plan.

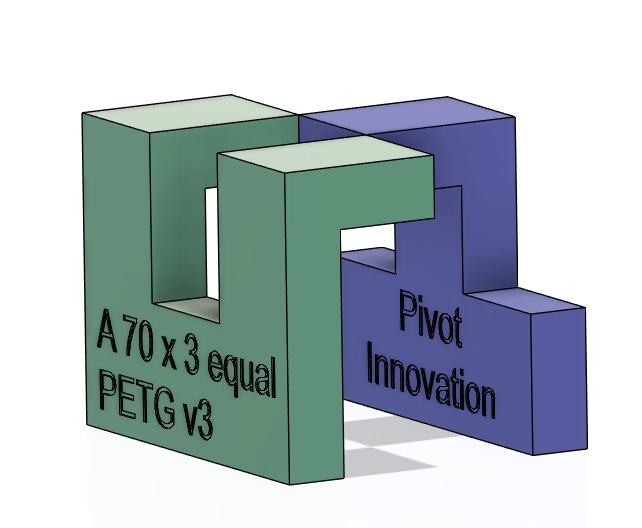
CAD render of a 3D printed tongue and groove joint in teal and purple, labelled with Pivot Innovation and material type
01

How the machine works

What is actually happening inside the printer. When a print fails at 4pm on a Friday, you will know why and be able to fix it.

  • Motion, extrusion and layer formation
  • Bed adhesion and temperature
  • Maintenance and what to check weekly
02

Choosing the right filament

Which material to reach for, what it costs, and where it will let you down in a classroom environment.

  • PLA, PETG and where each fits
  • Strength, finish and warping in practice
  • Safe handling and storage
03

Files and slicing

Where most classroom prints are won or lost. Get orientation, supports and settings right before you press print.

  • STL, 3MF and gcode without the jargon
  • Orientation and support strategy
  • Infill, walls and keeping print times short
04

Setting up and calibrating

Level the bed properly, calibrate once, and the machine is ready when your class walks in. Not ten minutes after.

  • First-layer and levelling routine
  • Calibration that actually matters
  • The four most common failure points and their fixes
05

Jigs, moulds and teaching aids

Print things that earn their place in a workshop. A jig that gives a Year 9 a clean dowel hole on the first try is worth fifty verbal explanations.

  • Drilling jigs and cutting guides
  • Moulds and cast parts
  • Exemplars students can handle and take apart
06

Fitting it into your programme

How to use the printer without it swallowing your timetable, your budget, or your Tuesday afternoon.

  • Sequencing print work inside a unit
  • Managing queue and machine time with a class
  • Costing a print run and tracking consumables

How the day runs

One room, one morning, one afternoon.

The Intro finishes at lunch. If you are on the full day, you stay on and spend the afternoon designing and printing parts you take home.

Morning8:30am – 12:30pm

How the printer works, and how to keep it working

Hands on the machines from the start. You work through what the settings actually do, get a first layer down properly, then break prints on purpose so you know how to fix them when it happens at school.

  • Machine walkthrough and choosing your filament
  • Slicing: what actually matters before you press print
  • Levelling, calibration and fixing the four most common failures

Intro to 3D Printing finishes here. Full-day teachers carry on after lunch.

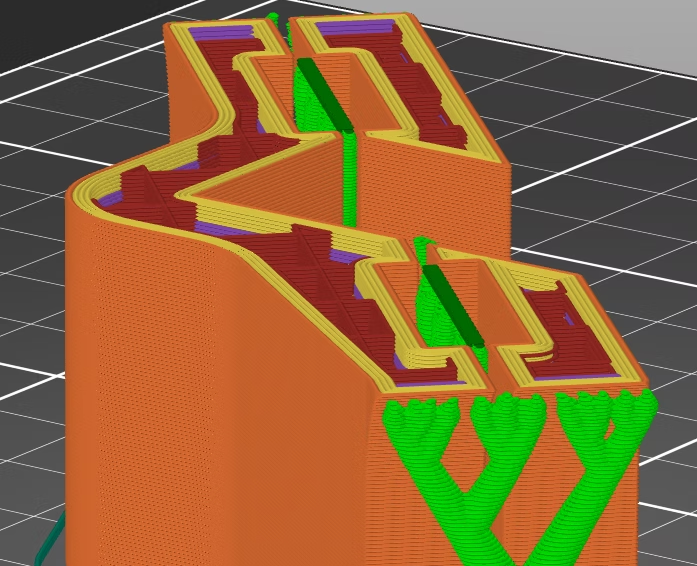
Slicer software showing toolpaths for a 3D printed jig — the orange, yellow and green layers visible before printing begins
Afternoon1:00pm – 4:30pm

Jigs, moulds and teaching aids for your class

You design and print a working jig, make a mould and cast parts from it, and work out where the printer fits inside a unit you already teach. You take the files home.

  • Design and print a working workshop jig
  • Make a mould, cast parts, demould
  • Map the printer into a unit of work

Classroom — Technology Teachers only. You leave by 4:30 with parts and files.

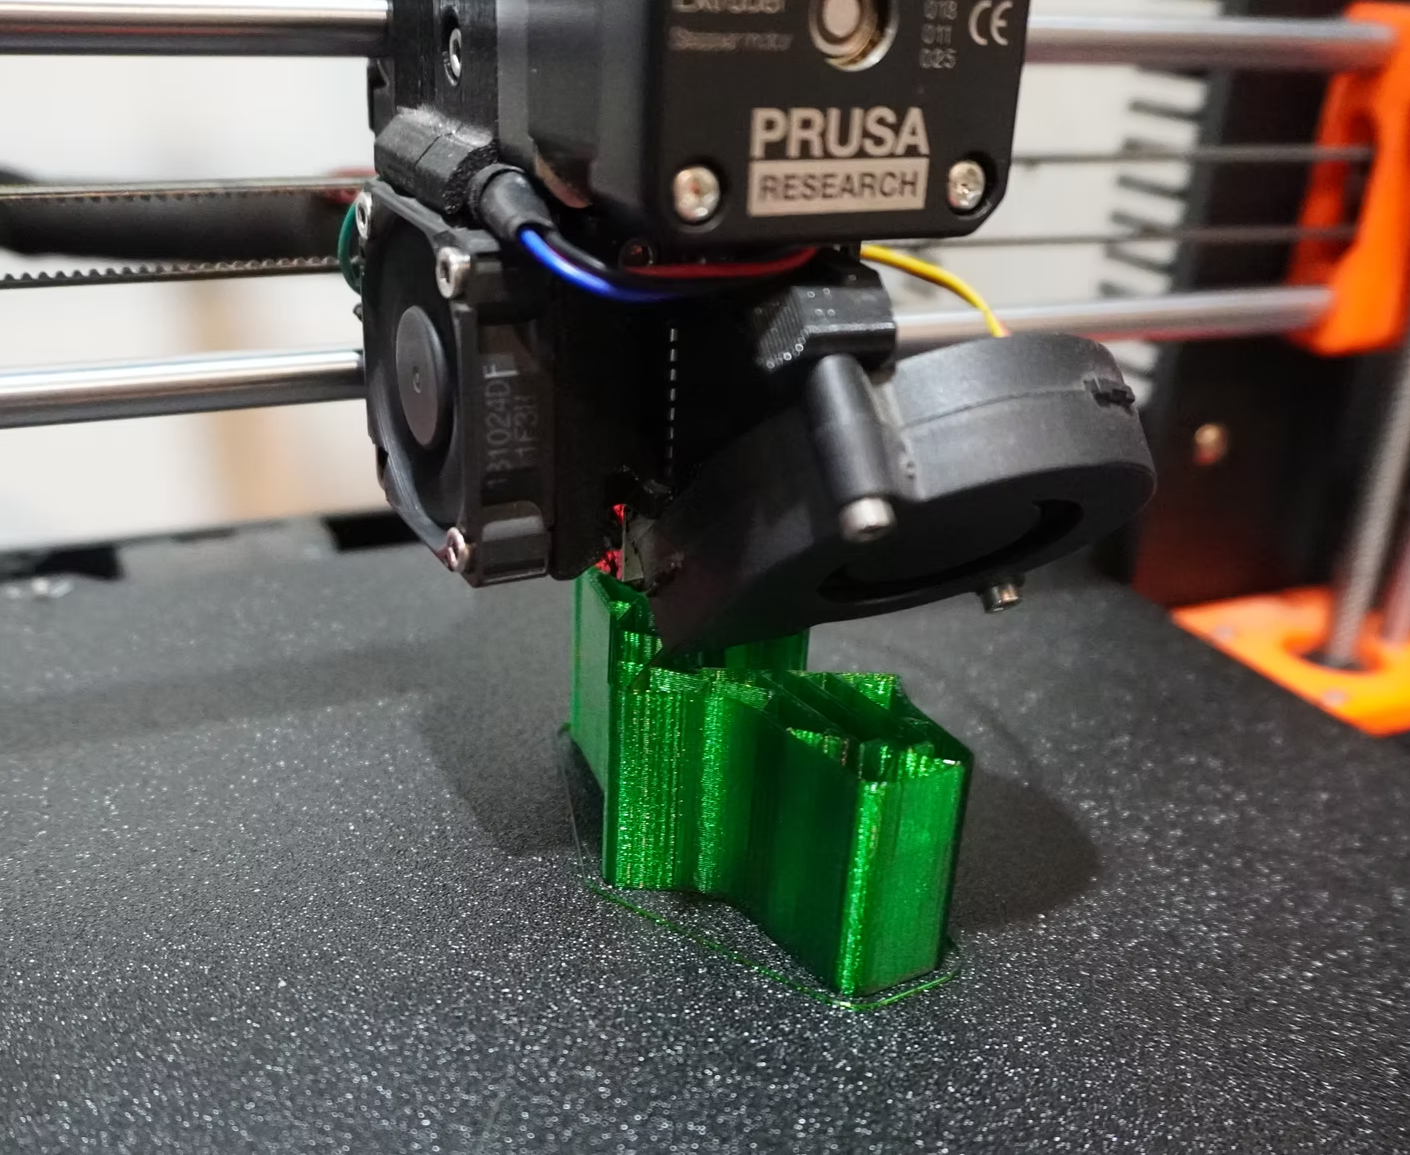
Close-up of a Prusa printer head printing the first layers of a green workshop jig on the build plate

From real classrooms

Four workshop problems, and what we printed to fix them.

These are actual jobs from technology teachers. On the full day you design and print your own version and take the files home.

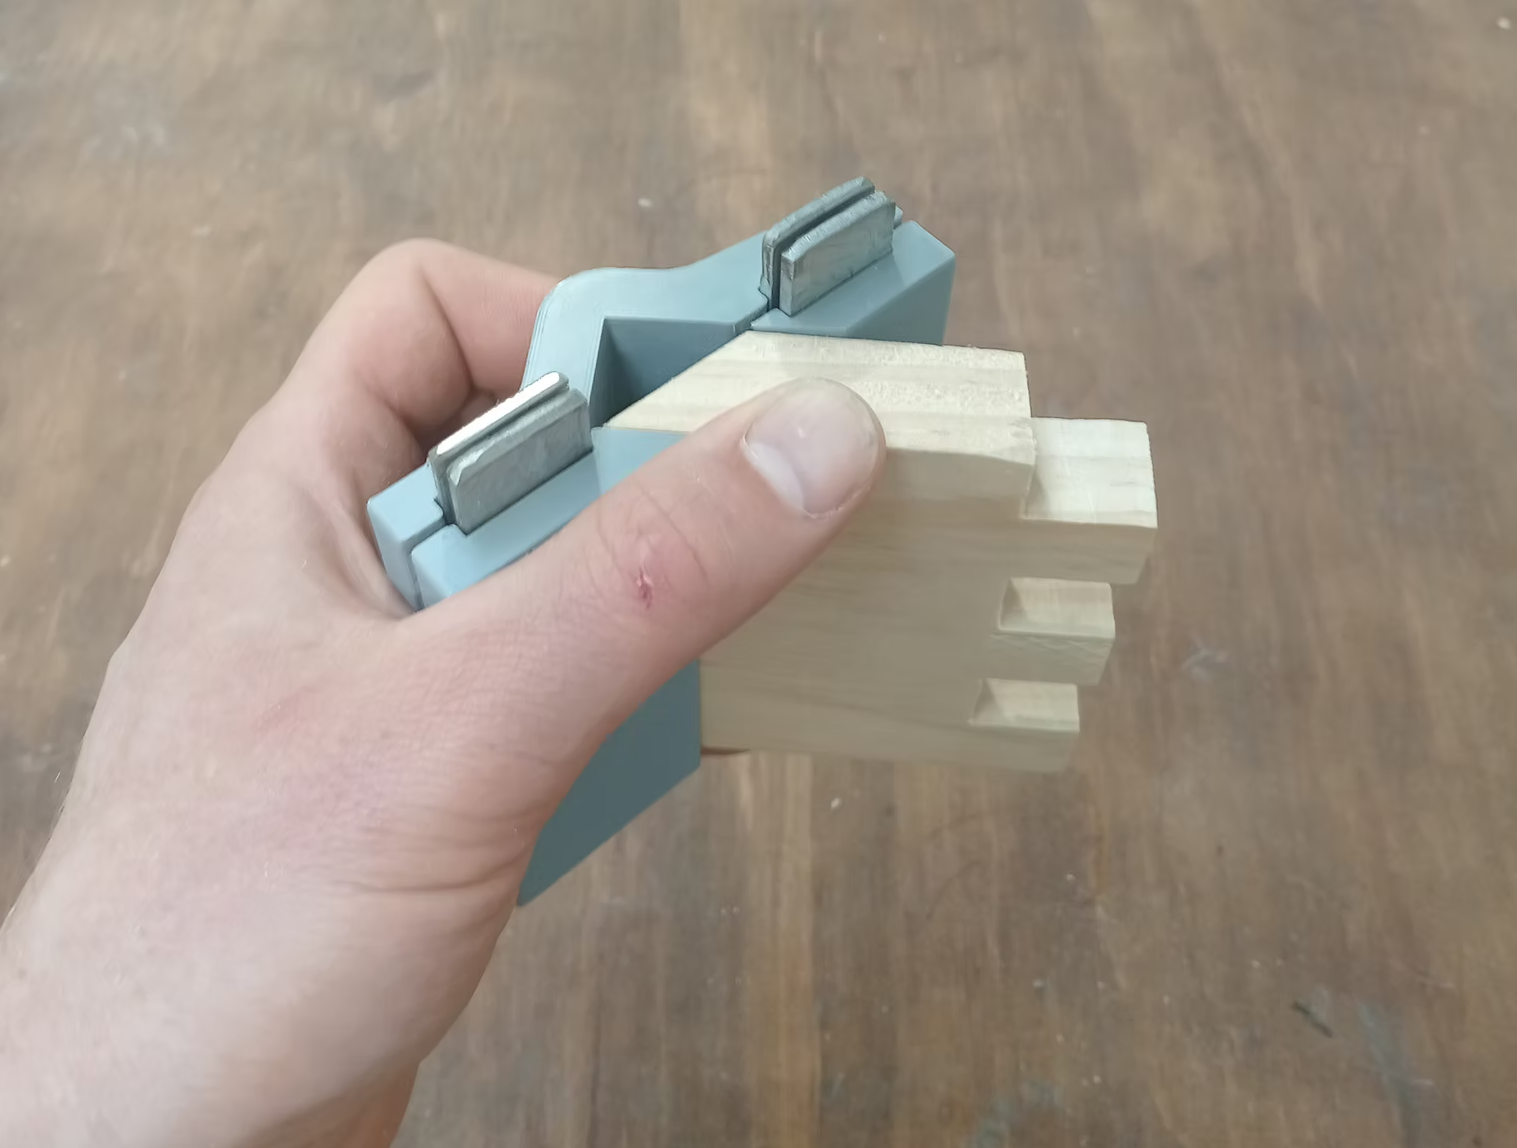
Hand holding a teal 3D printed mitre jig against a finger-jointed timber piece
Year 10 hard materials · finger joint unit
Case 01

Mitre jig on a finger joint

The problem
Students cutting mitres on a hand saw were getting inconsistent angles — corners that looked right individually but would not close up in a frame. The drop saw queue was eating the period and most students never got a second attempt.
What we printed
A small jig that registers the saw blade at exactly 45 degrees. Printed in teal PETG so it sits visibly on the timber. Each one takes under an hour and a class set lives in a tray on the bench.
What changed
Students cut their own mitres at the workbench with no queue. Corners that used to be filled came together cleanly, and the focus of the lesson moved from accuracy problems to finish quality.
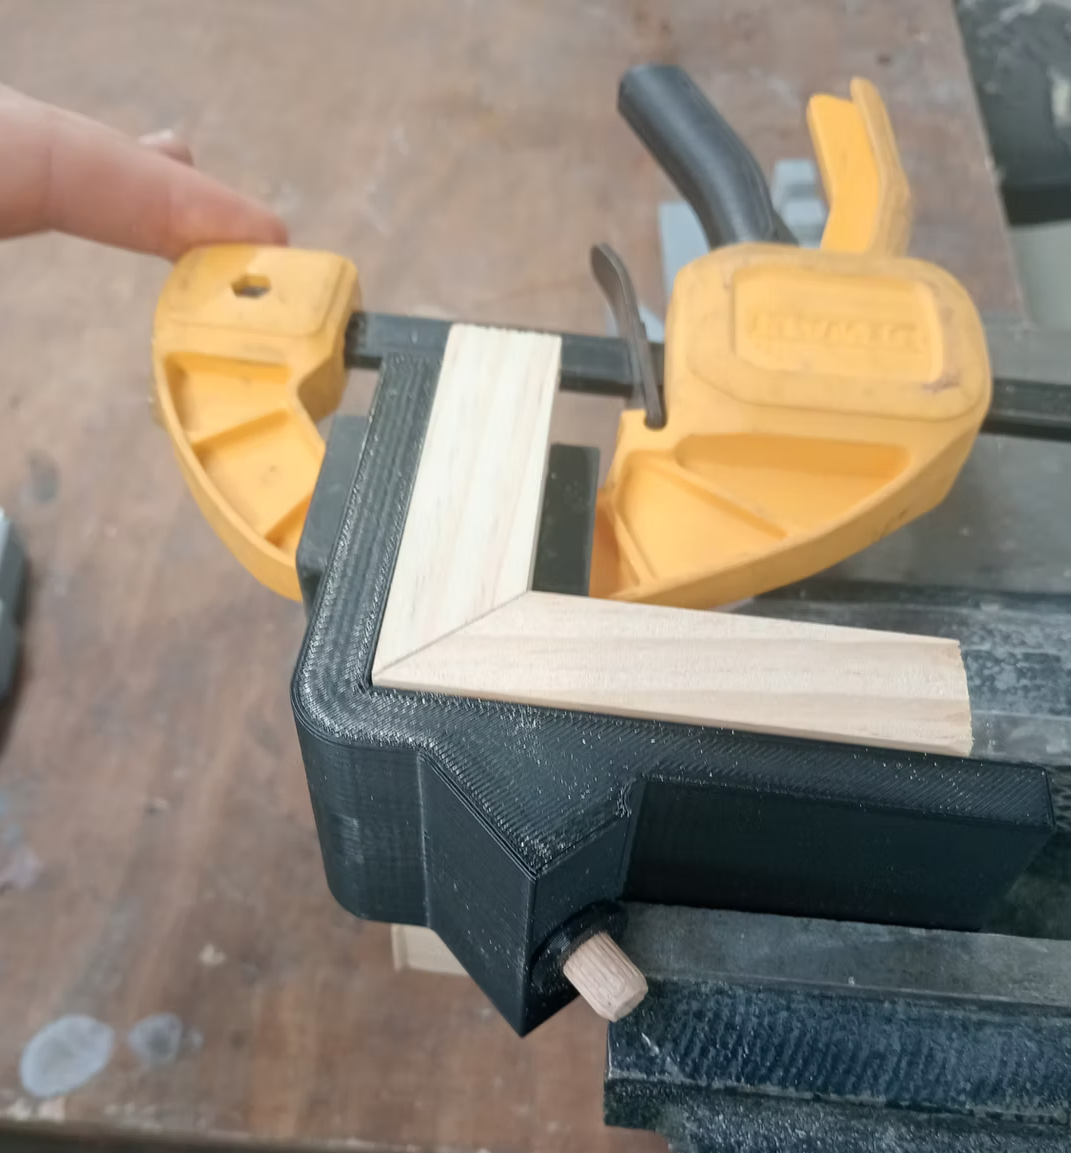
Black 3D printed corner clamping fixture holding two mitre-cut pine pieces at 90 degrees, secured with DeWalt clamps
Year 11 frame project · glue-up stage
Case 02

Corner clamping fixture

The problem
Getting a glued mitre frame to sit square while the adhesive set required four hands and a lot of hope. Students were losing square during clamp-up, and a crooked frame meant the whole unit was compromised by one bad ten minutes.
What we printed
A right-angle clamping fixture that holds two mitred pieces in register while clamps are applied. Printed in black PLA with a dowel pin to lock the position. Works with the standard DeWalt bar clamps already in the workshop.
What changed
Glue-ups went from a two-person job to something a student could do confidently alone. Frame reject rate dropped, and teachers had one less intervention point to manage during the period.
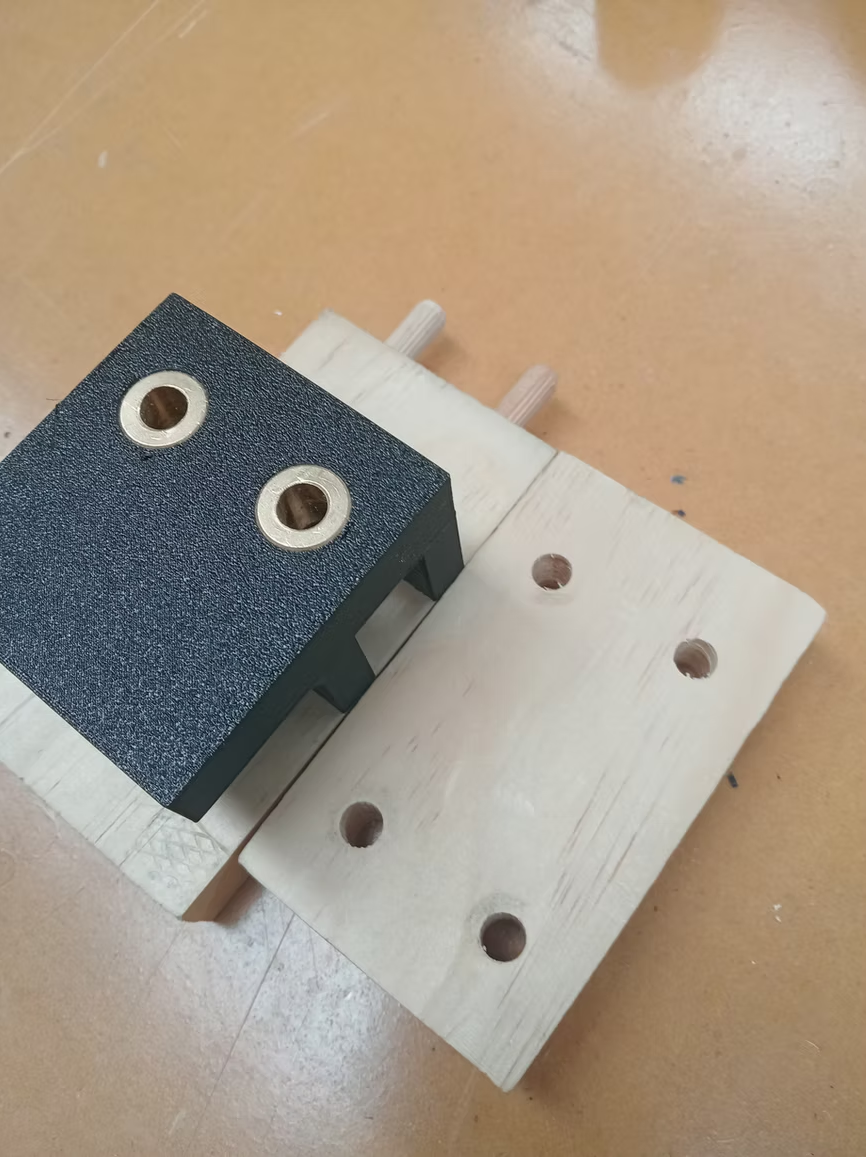
Dark 3D printed dowel drilling jig with brass bushes sitting on a pale timber board with clean dowel holes
Year 9 introduction to joining · 30 students
Case 03

Dowel drilling jig

The problem
Centred dowel holes are the first real accuracy test students meet, and they fail it in a very visible way. Misaligned holes meant carcases that would not pull square, and a queue at the pillar drill while everyone waited for the teacher to check each board.
What we printed
A clamp-on jig with two brass-bushed guide holes that self-centres on the timber edge. Once clamped, students drill their dowel hole through the guide. The part can also be glued directly in place and drilled with the dowel at the same time, combining operations in one step. The dark PETG body shows the layer lines clearly, so it doubles as its own teaching aid for how FDM printing works.
What changed
Square, centred holes on the first attempt. The pillar drill queue disappeared, and students got a result they were confident enough to keep building on rather than starting again.
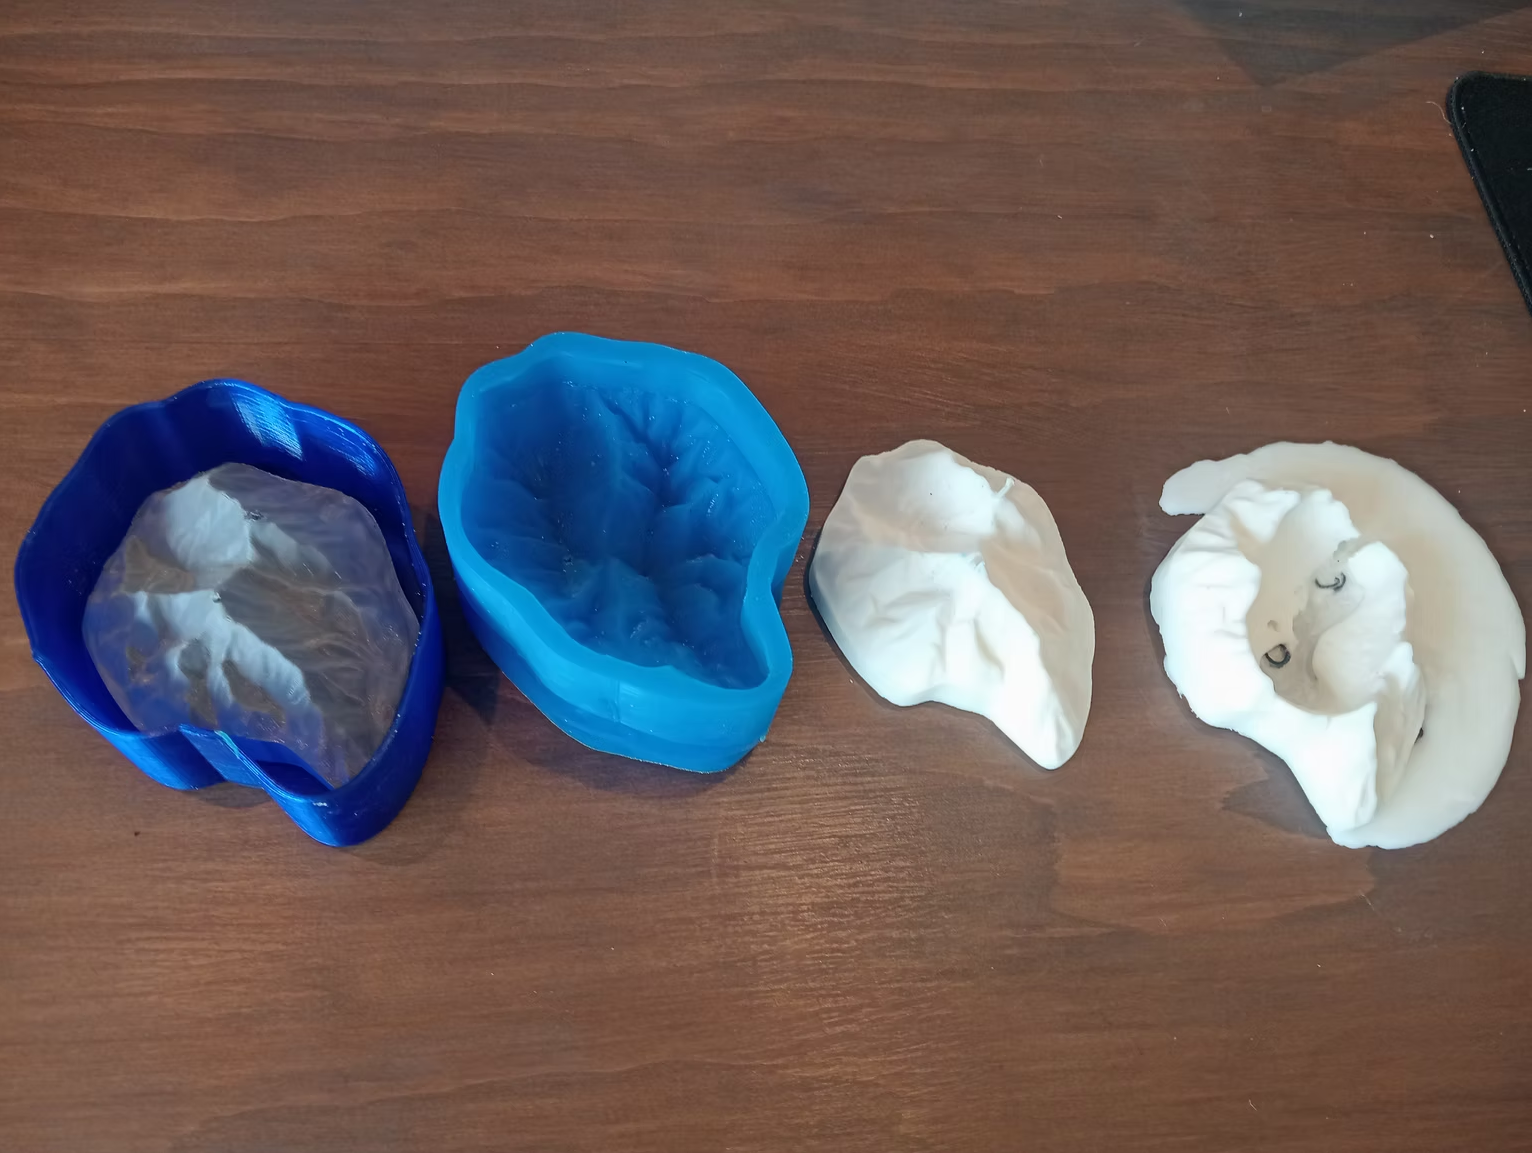
Blue 3D printed mould shells and white silicone mountain-shaped candle casts laid out on a wooden table
Cross-curricular project · Technology and Art
Case 04

Mountain candle mould

The problem
A teacher wanted students to design and make a product end to end: generate a mountain form as an STL using mapping-to-geometry software, process the file, print a mould, and cast a finished candle in it. The challenge was turning a generated landform into a mould that would actually release, and doing it within a school timetable.
What we printed
A two-part mould set: a rigid printed outer shell to hold shape, and a flexible silicone inner cast from it. Students generated the mountain form from real topographic data, reviewed the slicer file to understand supports and wall thickness, then printed the shell in blue PLA before casting the silicone.
What changed
Students went from a landscape photograph to a finished candle in a single unit of work. Every part of the digital-to-physical pipeline was visible and hands-on: generate, model, slice, print, cast, demould. The mould also works with wax alternatives, concrete and recycled 3D print material, letting students explore material properties and choices with the same form. The finished product was something they wanted to keep.
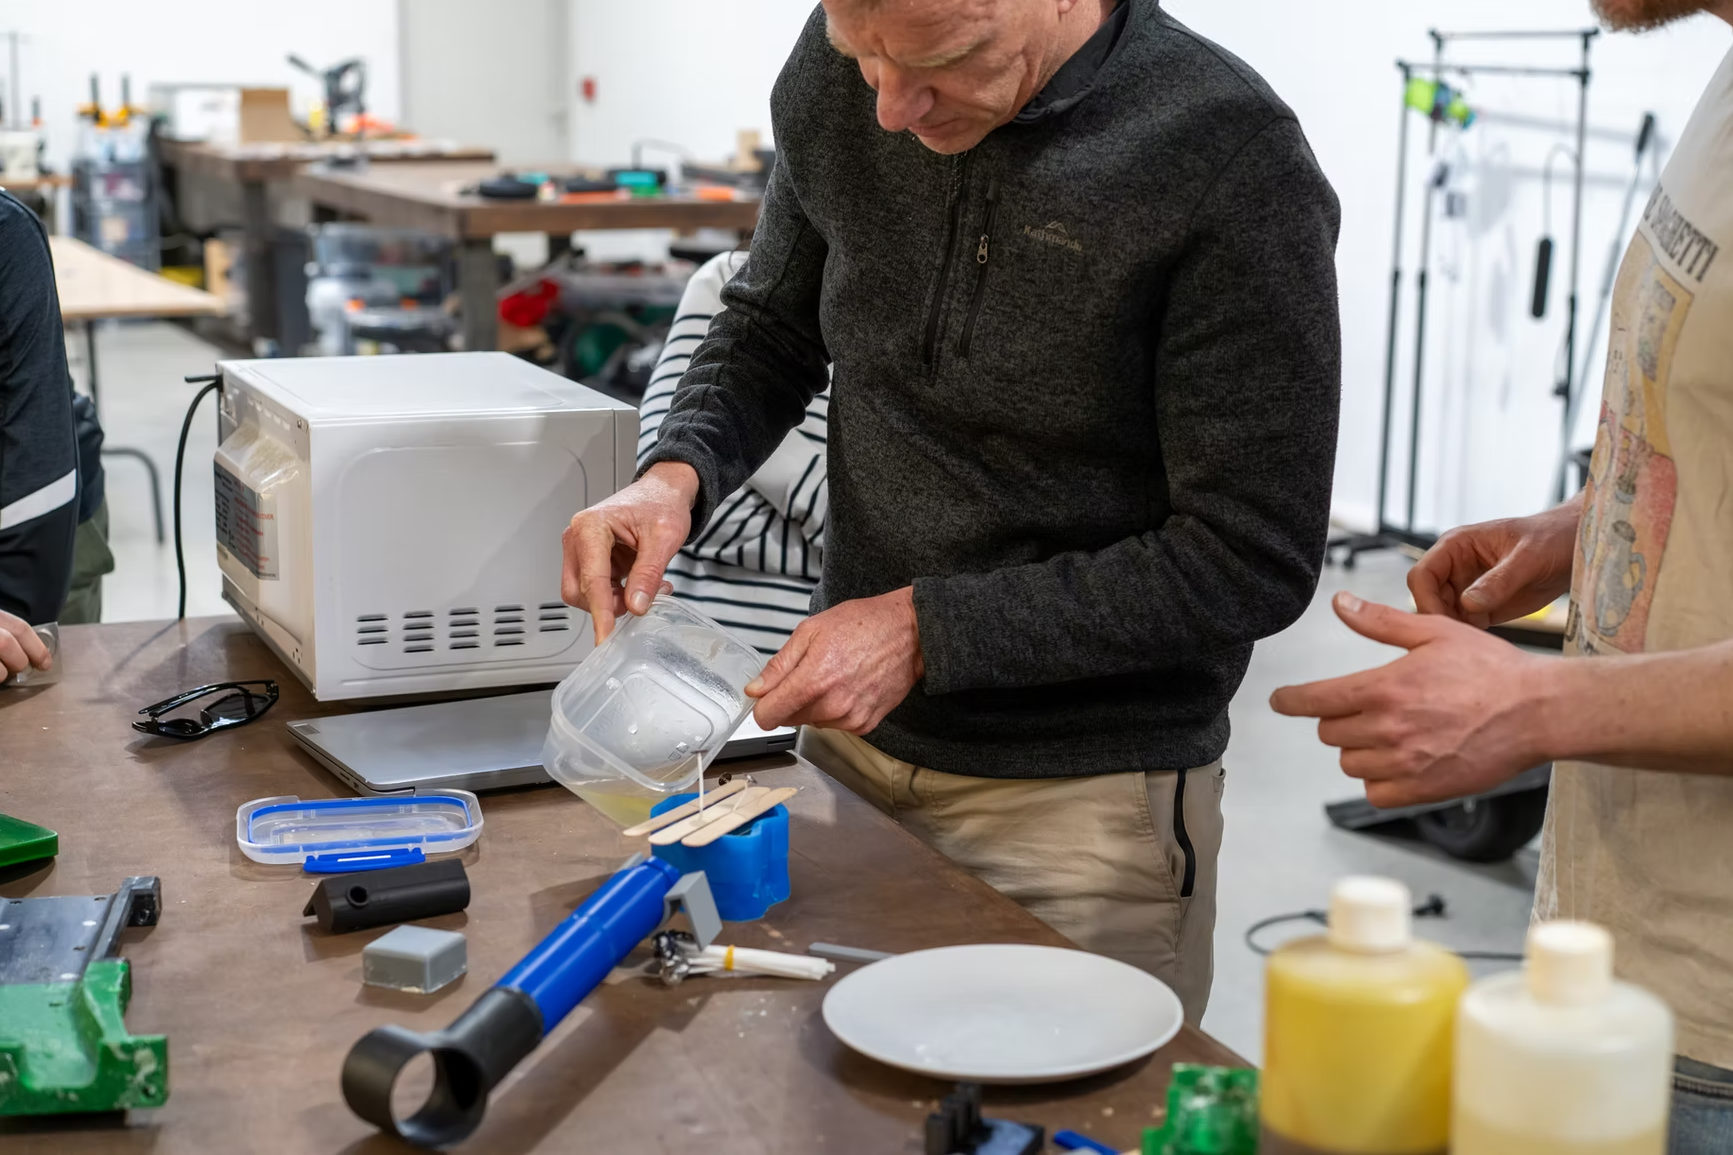
Jeremy pouring wax into a 3D printed mould during an in-school professional development workshop

In-school delivery

Or we come to you.

Same content, run in your own workshop on your own machines. Your staff train on the printers they will actually use, and if those printers are not running reliably, sorting that out is part of the day. Once you have three or more teachers to train, it is usually better value than sending them off site.

Day rate, not per seat
One price for the whole faculty
Your machines, your room
Staff train on the gear they teach with
Mapped to your programme
Jigs and exemplars built around units you already run

From the staffroom

What teachers say after the day.

Best professional development I have been to in years. We printed, we broke things, and I was using it with my students the following week.
Nisyola FifitaTechnology Teacher, Liger Leadership AcademyEducation

Common questions

What you probably want to know before booking.